
So, without further explanation: I present ROCKET BOX.

WHAT YOU'll NEED
* The bottle separators from a LARGE case of wine
* Scissors
* Hot melt glue gun
MAY BE NICE ... BUT NOT NECESSARY
* Paint
* Glitter
* Markers
TOTALLY A SPLURGE
* The wine that came in the box.
WHAT YOU DO

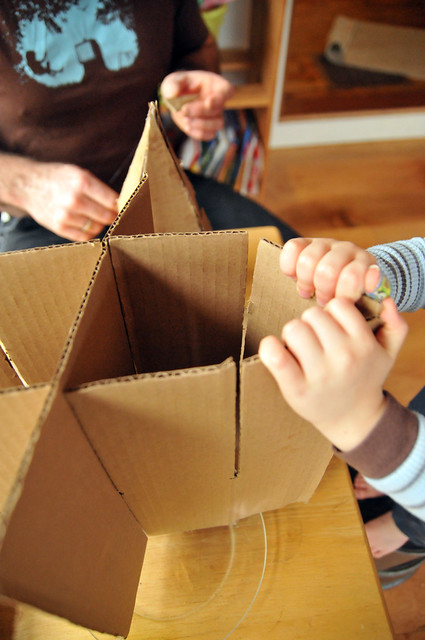
* Take the inserts out of the box.
* Cut away one section of cardboard from a four-section piece.
* Cut the top of the remaining tabs into triangles.
* Fold so that you have a square box and pointed end.
* Glue the edges in place creating a box and nosecone.
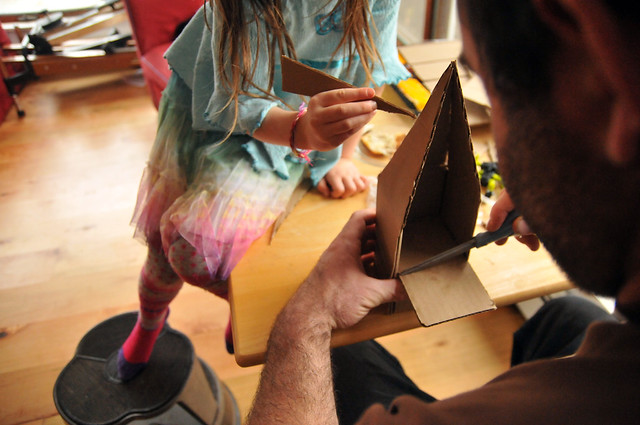
* Cut another triangular piece and glue into the nosecone.
* Take the fourth section of cardboard and glue it into the bottom of the rocket, a section will extend past the box. Allow enough extra space so that it "catches" under the rocket's nosecone.
* Score the bottom piece of cardboard and fold it upward to make a flap.
* Add as many floors (compartments) to the rocket as will fit.
* Cut more triangles and glue to exterior ... these can be handles.
* Decorate or leave plain
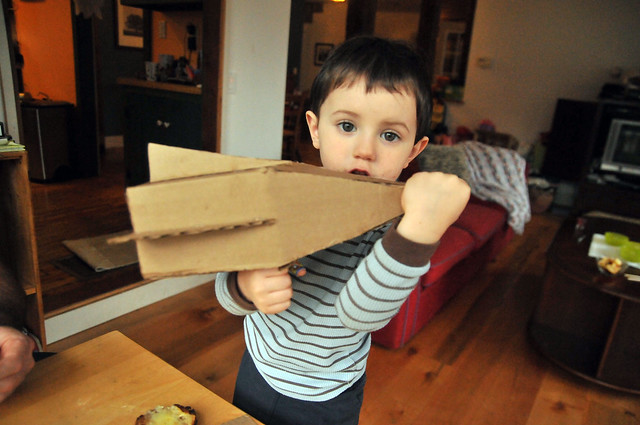
* Spend the next several hours in test-flight operations.
Also ...
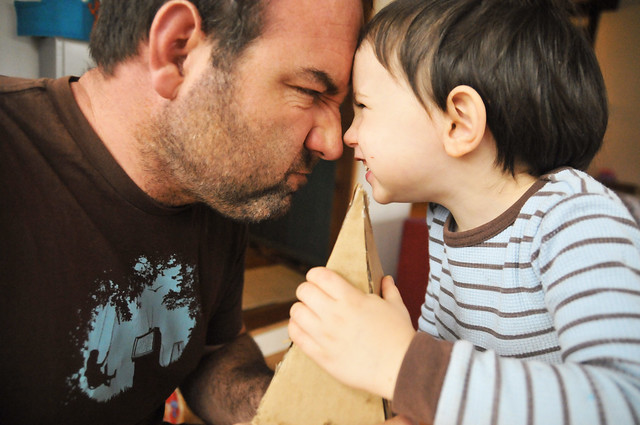
Say 'Thanks' to the engineer. He likes to be appreciated.
4 comments:
love this. LOVE. and that last photo is perfect. You couldn't have planned all that brown and blue--so great!
kudus, my friend.
kudos. and you could've planned all that brown and blue, but i know you didn't, which is why i especially love it. i'll stop talking now.
I am so fly-by-the-seat-of-my-pants ... it's true.
: )
Very crafty! And I do adore the photo of the engineer appreciation.
Post a Comment